
Last Updated on June 28, 2023 by TMB
- How to Transfer Money from Cash App to Netspend through Bank Account and Paypal
- How to Transfer Money from Cash App to Netspend Using Cash
- How to Withdraw Cash from Cash App by Requesting Cash Back at a Store
- How to Withdraw Cash from Cash App through an ATM
- How to Deposit Cash into Your Netspend Account using the Netspend Card
Unfortunately, you can’t transfer directly from Cash App to Netspend or from Netspend to Cash App, as they are two different platforms. So, you will need a workaround solution: a longer chain of money transfers.
Here is how to transfer money from Cash App to Netspend and the other way around from Netspend to Cash App:
- Transfer from your Cash App to a Linked Bank Account
- Transfer from the Bank Account to your PayPal.
- Fund your Netspend card with PayPal.
- Steps vice versa work to transfer money from Netspend to Cash App
You can also grab cash from your Cash App account to deposit into your Netspend account. Actually, it may be the easiest way to move money from Cash App to Netspend and vice versa.
You can also transfer money from Cash App to your Bank Account and then to your Netspend. But, when money is in your Netspend account, you cannot transfer money back to the bank account.
How to Transfer Money from Cash App to Netspend through Bank Account and Paypal
Netspend has partnered with Paypal to give their customers an easy way to load their card’s balance and to cash out.
Paypal is also a great way to fund accounts as you can connect it to a bank account easily.
You can’t transfer money directly from Cash App to Paypal though.
Instead, what you can do is link your bank account to both Cash App and Paypal, transfer money from Cash App to your bank account, before finally transferring it over to Netspend from Paypal.
First, let me go over linking your bank account to both Cash App and Paypal before I go over the transfer methods:
How to Link Your Bank Account to Cash App
Adding a new bank account to Cash App is easy. You can do the whole process from start to finish in the app.
To do so, start by downloading Cash App and heading to the profile tab in the upper right hand corner of the home screen. If you have a profile picture, you’ll see it here.
Scroll down and click on “Linked Banks”.
“Linked Banks” will show you any bank accounts or debit cards you currently have linked to Cash App. It will also allow you to add new accounts.
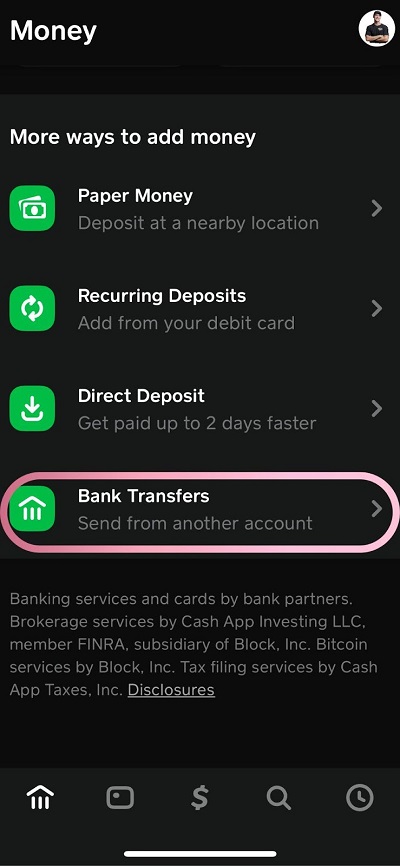
Click “Link Bank Account” and use Plaid to do so.
Plaid is a software that Cash App uses to connect their accounts to external accounts quickly and securely. To use Plaid, find your bank on their list of financial institutions and click on it.
They will take you to your bank’s online platform, where you can log in using your normal username and password.
Logging in will prompt your bank to ask if they have your permission to give Plaid and Cash App your information.
Saying yes will allow Plaid to connect your account automatically.
If you don’t want to login using Plaid, you can always connect your account using your account number and routing number.
The process takes a little bit longer manually.
Once your account is linked to Cash App you can use it to both add money to your fintech account’s balance and withdraw from it.
You can send transfers for free that take 1-3 business days to reach your account, or pay a small fee and send them instantly.
How to Link Your Bank Account to Paypal
Linking your bank account to Paypal is quick, easy, and secure.
Cash App uses Plaid to do their connecting and encrypting; Paypal uses Yodlee.
The process is virtually identical, and it starts with you downloading Paypal.
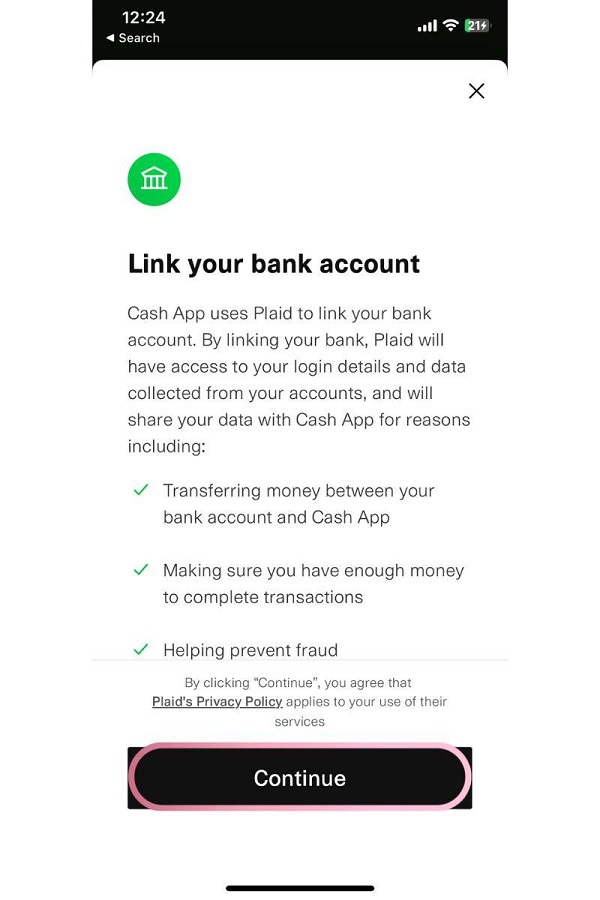
Log into Paypal and head to the “Wallet” tab. Click on “Add banks and cards” in the upper portion of the screen.
Click “Banks” and find yours from their list. If your bank isn’t one of the first to appear on the screen, use the search bar to find it.
Once you find your account, you can go ahead and link it using Yodlee.
If you’re unfamiliar, Yodlee is a service Paypal uses to make sure their connection to external accounts is secure and their transactions process quickly.
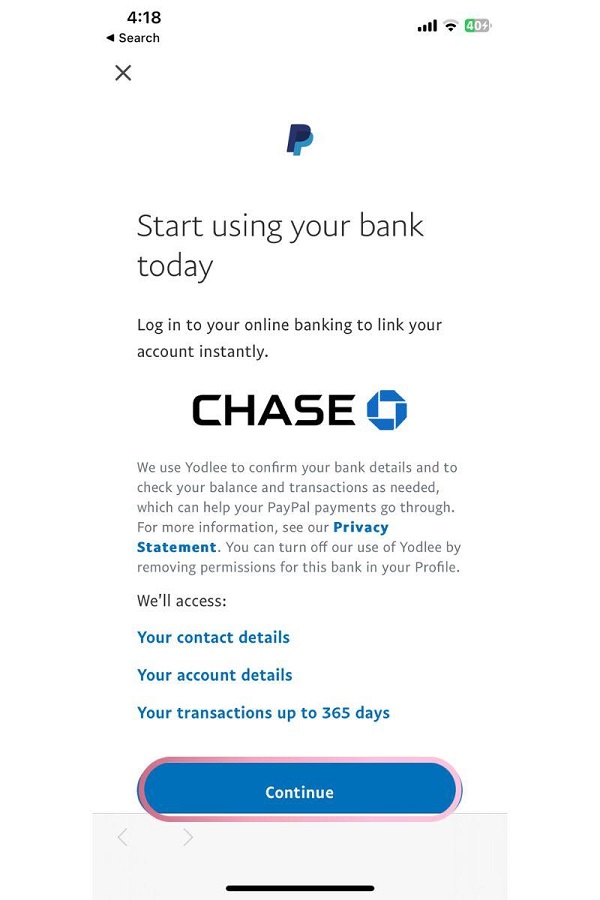
Yodlee will let you log into your bank’s online banking platform where you can enter your normal username and password.
After logging in, your bank will ask for your permission to share your information with Yodlee.
If you click yes, the rest of the set-up is automatic.
Yodless will have permission to access your account number and routing number, sharing them with Paypal to connect your account to their platform.
If you choose not to let Yodlee access your information, you can enter it manually yourself.
Once your account is connected to Paypal, it is good to use for free transfers until you choose to disconnect it.
You can now transfer money from your Cash App account to your bank account, then Paypal, before finally sending it to Netspend.
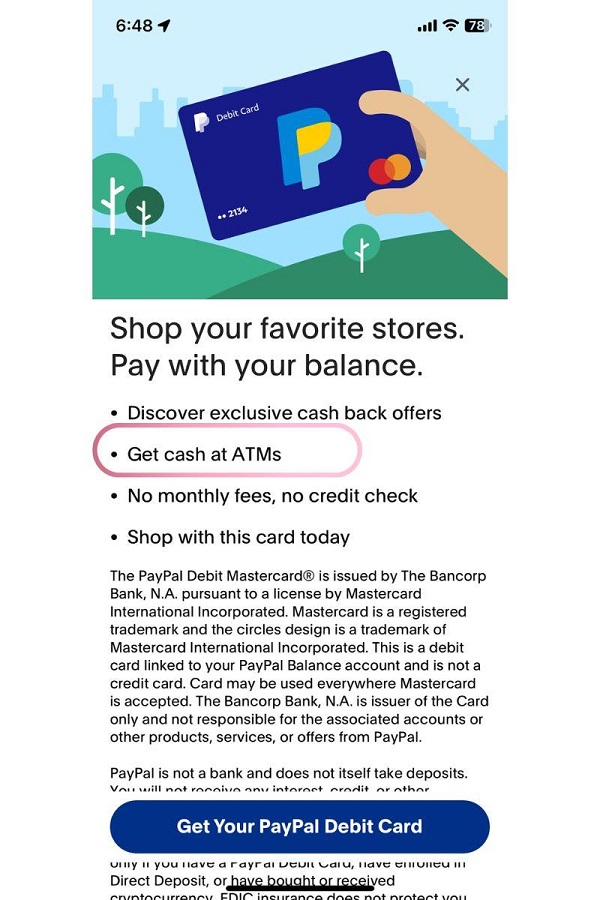
You could also get cash from your Paypal account and deposit it into your Netspend account, but I’ll include more on that later in the article.
How to Transfer Money from Cash App to Netspend Using Cash
Sending money from Cash App to Netspend isn’t the most straightforward process.
You can use a Paypal account and a bank account as middle-men in your transfer, doing the process online, or you can grab cash from your accounts and deposit it the old fashioned way.
You can withdraw cash from your Cash App account using a Cash App debit card at an ATM or by getting cash back with a retail cashier.
With your cash, head to a Netspend Reload Center and deposit the funds onto your Netspend card.
I’ll break down both the best ways to withdraw cash from Cash App and the best ways to load it onto your Netspend card below:
How to Withdraw Cash from Cash App by Requesting Cash Back at a Store
If you’re in need of cash from Cash App, getting it back during a purchase is a great way to do two things at once. You can purchase whatever you need while getting cash at no additional charge.
When getting cash back from a store, there are a few things to keep in mind.
First, you’ll need the Cash Card, Cash App’s debit card.
Second, not all retail stores allow cash back. Check with the store before you head in.
Lastly, there is a limit to how much cash back you can receive in one transaction.
The limit depends on the store and usually ranges from $20 to $100, with stores also giving out money in denominations of $20.
1. Go to a Retail Store That Allows Cash Back
Most popular retail stores like Walmart, Target, and Walgreens allow cash back, but not all of them. Double-check with the store before initiating your transaction.
Some stores may display signs indicating whether or not they offer cash back on their physical stores, or they’ll have the information on their website.
2. Make a Purchase Using Your Cash Card
At the checkout, insert your Cash Card into the card reader, and select “debit.” Then, enter your PIN just like you would with a regular debit card.
You can get cash back from any purchase you make. If you get $50 in items and request $20 in cash back, the transaction may appear as one $70 transaction or two separate transactions for their respective dollar amounts.
3. Ask For Cash Back From The Cashier
After your purchase is approved, ask the cashier for cash back. Let them know how much cash you’d like to receive.
Most stores have a limit to how much cash they can give back per transaction, so be sure to ask about the limit.
4. Wait For The Cashier To Process Your Request
The cashier will process your cash back request and give you the funds, usually in denominations of $20.
The process is free and is a great way to buy the items you need and get cash without heading to a bank.
How to Withdraw Cash from Cash App through an ATM
Cash Cards work at any ATM, giving Cash App users options when looking for somewhere to grab cash from.
They’re also partnered with the MoneyPass ATM system so you can get ATM withdrawals for free as well.
1. Find an ATM
Cash App is partnered with the MoneyPass ATM network to provide their customers with free access to a network of ATMs.
You can search for MoneyPass’ ATMs near you by using the ATM locator link provided in the Cash App or by visiting the MoneyPass website.
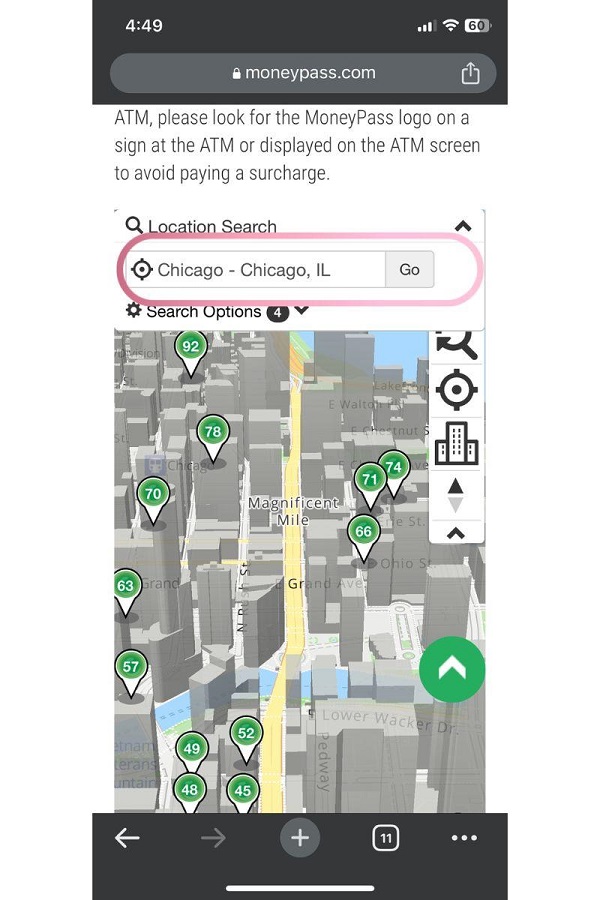
Once you have found an ATM near you, visit the location and follow the prompts on the screen.
You can also use an ATM outside of the MoneyPass system, but there may be fees associated with your withdrawal.
2. Withdraw Cash
To withdraw cash from your Cash App account, you’ll need to insert your Cash Card into the ATM, then enter your PIN.
The amount of cash you can withdraw depends on the ATM’s available balance and your Cash App balance.
There are also ATM limits on your Cash App account.
Check them in the app before you head to an ATM if you’re needing to withdraw a large amount.
Be mindful of any fees associated with your withdrawal; some ATMs may charge fees on top of the amount you withdraw.
3. Check Your Cash App Balance
After withdrawing your money, it’s important to check your Cash App balance to make sure the transaction went through correctly.
It’s not the most common occurrence, but ATMs can sometimes charge you for two withdrawals when you only requested one.
If you went to an out of network ATM, you should see the fees associated with the withdrawal as well.
Once you’ve gotten your cash from your Cash App account, either through an ATM or by getting cash back after making a purchase, you can deposit it into your Netspend account using your Netspend card.
How to Deposit Cash into Your Netspend Account using the Netspend Card
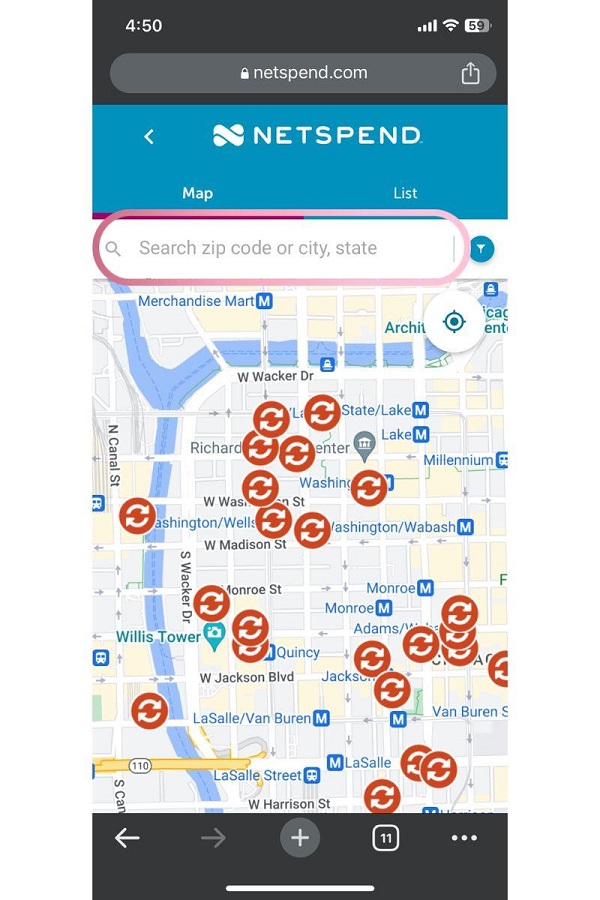
Netspend allows their customers to add cash onto their cards through their extensive network of Reload Centers.
These centers may charge a small fee but they provide Netspend customers with a location to deposit their funds.
It’s easy to find a Reload Center and deposit your cash into your Netspend account.
Let me break it down in easy to follow steps:
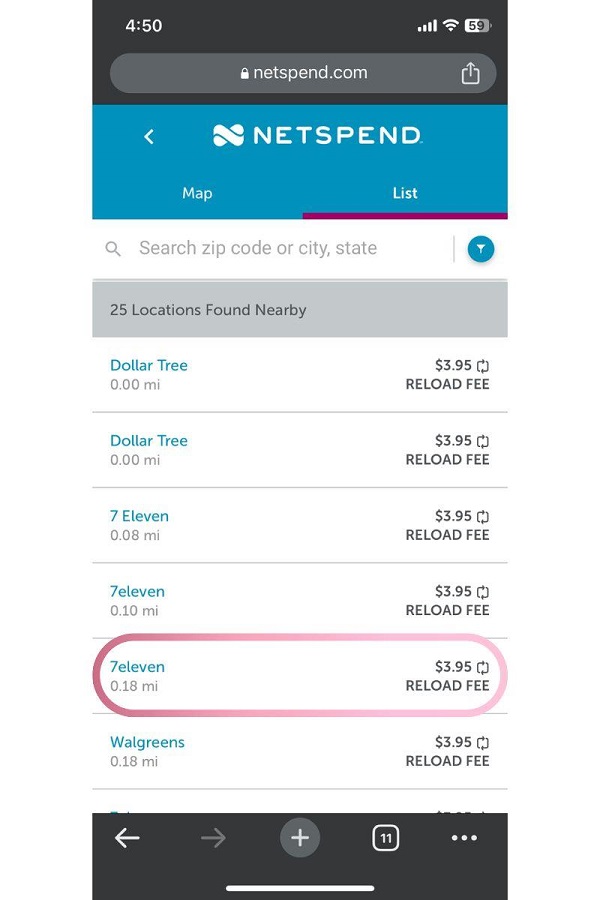
1. Locate a Netspend Reload Center
The first step in depositing cash onto your Netspend card is to locate a Netspend Reload Center near you. You can find a list of Netspend Reload Centers on their website or mobile app.
Once you have found a Reload Center, you can visit it and deposit cash onto your Netspend card.
Some common Netspend reload centers are 7-Eleven, CVS Pharmacy, and Walgreens locations.
2. Bring Your Netspend Card and Cash to the Reload Center
After you have found a Netspend Reload Center, you can bring your Netspend card and the cash you wish to deposit.
The staff at the Reload Center will ask you some basic security questions to verify your identity and may ask for identification, and then you can deposit cash onto your card.
3. Pay the Deposit Fee
Netspend charges a fee for the deposit service. The fee can range from $2 to $5 depending on the Reload Center you choose with most centers charging a $3.95 fee.
Once you have deposited cash onto your Netspend card, the fee will be deducted from the amount you deposited before it ever reaches your account, so you don’t need to worry about overdrafting to make a deposit.
4. Wait for the Deposit to Post
The deposit time can vary depending on the Reload Center and the amount deposited, but cash deposits should go through immediately if the servers are up and running.
Usually, the deposit will be posted to your Netspend account within a few minutes, but it can take up to an hour.
You can check your account balance to confirm that the deposit has been posted.
5. Use Your Netspend Card
Congratulations!
You have successfully deposited cash onto your Netspend card using a Netspend Reload Center.
You can now use your card to make purchases, pay bills, or withdraw cash from an ATM, if you want your cash back!
If you found this article useful, check more written by me and our team: